Introduction: Your Journey to Solar Independence
Welcome to the world of solar energy! If you’re considering a DIY solar panel installation for your home, you’re joining a growing community of residents embracing a sustainable and cost-effective power source.
Here at Wattmasters, we understand the value of independence when it comes to home energy solutions. That’s why we’ve crafted this guide to help you navigate the solar installation process, providing clarity and support every step of the way.
What You Need to Know Before You Start Your DIY Solar Project
Before diving into your DIY solar panel installation, it’s crucial to lay the groundwork. This isn’t just about buying panels and throwing them on the roof. There’s a bit of prep involved to ensure that your solar project is not only successful but also safe and efficient. At Wattmasters, we’ve seen our fair share of solar setups and are here to pass on that wisdom to you. So, here’s what you need to consider:
Assessing Your Solar Potential
Not every house is positioned to take full advantage of the solar companies in Phoenix offer. Here’s how to evaluate yours:
- Sun Exposure: Your home needs to have ample sunlight, with minimal shade from trees or other structures.
- Roof Condition: Is your roof ready for solar? It should be in good repair and able to handle the weight of the panels.
Understanding Local Regulations and Incentives
- Permits: Solar installers in Phoenix are familiar with local building codes and permit requirements – and you should be too for your DIY project.
- Incentives: Are solar panels worth it in Arizona?Yes, especially when you factor in state and federal tax incentives that reduce the overall cost.
Choosing the Right Solar Panels and Equipment
- Quality and Efficiency: Not all DIY solar panels are created equal. Select high-efficiency panels from reputable solar companies near me or online.
- Compatibility: Ensure all components are compatible with each other. This includes your solar inverter, mounting hardware, and monitoring systems.
Planning for Installation and Maintenance
- Safety First: Understand the safety risks involved. This is electricity, after all. If you’re not sure, consulting with a solar energy contractor can provide guidance.
- Long-Term Care: Learn about the maintenance your panels will need. Wattmasters can advise on keeping your system in top shape.
Considering the Big Picture
- Energy Needs: Calculate your household’s energy consumption to determine the size of the solar system DIY project.
- Budget: Account for all costs, including potential EV Charging Station Contractors if you plan to charge an electric vehicle.
By addressing these key points, you’re setting yourself up for a solar DIY project that’s efficient, cost-effective, and built to last. Remember, Wattmasters is here to help with tips, supplies, and expertise—even if you’re going all-in on the DIY route.
How to Pick the Perfect Spot for Your Solar Panels
Selecting the optimal location for your solar panels is a key step in your DIY solar journey. Whether you’re installing a diy solar system or just a few diy solar panels, the right placement is crucial to harnessing solar energy efficiently. Here are some points to consider for a successful diy solar panel installation:
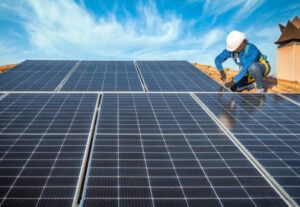
- Sunlight Access: For solar power diy, maximum sun exposure is essential. Your diy solar panels for home should be positioned where they can absorb the most sunlight, typically on a south-facing roof.
- Avoiding Shade: To optimize your diy solar energy production, ensure there’s no shade covering your solar panels diy at any point during the day.
- Roof Integrity: Before you start your diy solar panel system, check your roof’s condition. It should be sturdy enough to support your home solar diy setup.
- Installation Angle: The tilt of your diy solar panels home should correspond with your latitude, which maximizes the efficiency of your solar system diy.
- Local Regulations: Before you do it yourself solar installation, make sure to comply with local building codes and homeowner association rules.
- Expansion Possibilities: If you might expand your diy solar power system in the future, consider this when choosing the location for your solar diy project.
- Self-Installation: If you’re confident in your abilities, installing solar panels diy can be a fulfilling project. However, if you need guidance, a solar designer can provide expert advice.

Simple Steps to Assemble Your DIY Solar Panels
Assembling your DIY solar panels might sound like something out of a science project, but it’s more straightforward than you might think. With a bit of patience and the right tools, you can put together your solar power DIY system and start harnessing the sun’s energy right from your backyard. Here’s a step-by-step guide to get you started:
- Gather Your Materials: First things first, you need to have all your DIY solar components on hand. This includes the solar panels, an inverter, mounting hardware, and wiring. You can find solar panel kits that package all these essentials together, making it easier for DIY solar installation.
- Plan Your Layout: Before you start drilling or mounting, plan where each solar panel will go. This is crucial for home solar DIY projects to ensure your panels get maximum sunlight and are properly aligned.
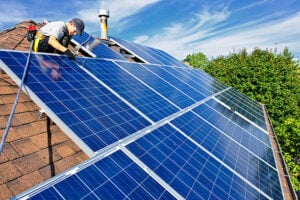
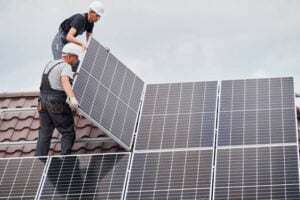
- Mount the Frames: The mounting frames will support your DIY solar panels. Secure them to your roof or chosen location, making sure they’re sturdy and properly angled for optimal sun exposure.
- Install the Solar Panels: Carefully place your DIY solar panels onto the frames. These panels should lock into place on the mounting frames. Ensure they’re secure to withstand weather conditions.
- Wire the Panels: Connect your solar panels DIY together using the correct wiring. This step is crucial for the efficiency of your DIY solar power system. If you’re unsure, it’s wise to consult a solar energy contractor or solar designer for advice.
- Connect to an Inverter: Your DIY solar power needs to be converted from DC to AC, which is where the inverter comes in. Connect your panels to the inverter, which then connects to your home’s power system.
- Test Your System: Before you start using your DIY solar energy, test the system to ensure it’s working correctly. This includes checking the inverter’s connections and making sure the panels are generating power.
Simple Steps to Assemble Your DIY Solar Panels
Assembling your DIY solar panels might sound like something out of a science project, but it’s more straightforward than you might think. With a bit of patience and the right tools, you can put together your solar power DIY system and start harnessing the sun’s energy right from your backyard. Here’s a step-by-step guide to get you started:
- Gather Your Materials: First things first, you need to have all your DIY solar components on hand. This includes the solar panels, an inverter, mounting hardware, and wiring. You can find solar panel kits that package all these essentials together, making it easier for DIY solar installation.
- Plan Your Layout: Before you start drilling or mounting, plan where each solar panel will go. This is crucial for home solar DIY projects to ensure your panels get maximum sunlight and are properly aligned.
- Mount the Frames: The mounting frames will support your DIY solar panels. Secure them to your roof or chosen location, making sure they’re sturdy and properly angled for optimal sun exposure.
- Install the Solar Panels: Carefully place your DIY solar panels onto the frames. These panels should lock into place on the mounting frames. Ensure they’re secure to withstand weather conditions.
- Wire the Panels: Connect your solar panels DIY together using the correct wiring. This step is crucial for the efficiency of your DIY solar power system. If you’re unsure, it’s wise to consult a solar energy contractor or solar designer for advice.
- Connect to an Inverter: Your DIY solar power needs to be converted from DC to AC, which is where the inverter comes in. Connect your panels to the inverter, which then connects to your home’s power system.
- Test Your System: Before you start using your DIY solar energy, test the system to ensure it’s working correctly. This includes checking the inverter’s connections and making sure the panels are generating power.
Wiring Basics for Your DIY Solar Panels
Wiring might seem like the complex part of setting up your DIY solar system, but don’t worry—it’s more straightforward than it appears. Proper wiring is crucial for safely and efficiently connecting your solar panels to your home’s electrical system. Here’s a beginner-friendly rundown to get your solar power DIY project powered up.
Essential Wiring Components
- Solar Cables: These are specially designed to withstand outdoor conditions and connect your solar panels to the inverter.
- Connectors: Use quality connectors to ensure secure and efficient connections between your DIY solar panels.
- Inverter: This device converts the DC electricity generated by your solar panels into AC electricity that your home can use.
Step-by-Step Wiring Guide
- Plan Your Route: Before you start, plan the cable route from your solar panels to your inverter and then to your home’s electrical panel.
- Connect the Panels: Attach the connectors to the cables and link your DIY solar panels. Make sure to follow the manufacturer’s instructions for series or parallel connections.
- Ground Your System: For safety, ensure your solar system is properly grounded. This protects against electrical surges and reduces the risk of shock.
- Link to the Inverter: Run the cables from your solar panels to your inverter. The inverter’s input should match the total voltage and current of your panels.
- Connect to Your Home: The final step is connecting the inverter to your home’s electrical panel. This might require professional help to ensure it’s done safely and in accordance with local electrical codes.
Safety First
Electrical work can be dangerous. If you’re ever unsure about the wiring process for your DIY solar panel installation, it’s best to consult with a professional solar energy contractor. Safety should always come first in any DIY solar install.

Testing Your DIY Solar Panels for the First Time
Testing your setup ensures everything is working correctly and safely before you start relying on it for your daily power needs. Don’t worry; this step isn’t as daunting as it might sound. Here’s how to do it in simple terms:
Get the Right Tools
To test your solar panels, you’ll need a multimeter. This handy tool measures voltage and current and is essential for any DIY solar enthusiast.
Check the Weather
For the most accurate test results, pick a sunny day. Solar panels perform best under direct sunlight, so it’s the perfect time to see what your solar power DIY project can do.
Measure Voltage
- Set your multimeter to measure DC voltage.
- Connect the multimeter’s positive lead to the positive wire of your solar panel and the negative lead to the negative wire.
- The reading should match or be close to the solar panel’s rated voltage. This verifies that your solar panels DIY are generating power as expected.
Measure Current
- Switch your multimeter to measure DC current.
- Again, connect the positive lead to the positive wire and the negative lead to the negative wire.
- The current reading should be near the solar panel’s rated current under full sun. This test confirms that your DIY solar panels for home are converting sunlight into electrical energy efficiently.
Inspect Connections
Ensure all connections are secure and there are no loose wires. Loose or poor connections can lead to inefficiencies and even safety hazards in your DIY solar installation.
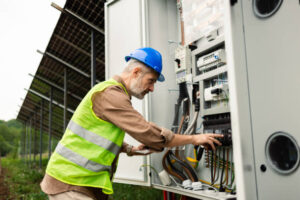
Verify Inverter Operation
Turn on your inverter and check if it’s correctly converting DC to AC. Most inverters will have an indicator light or a display showing operational status. This step is crucial for integrating your DIY solar energy system into your home’s power grid.
Maintenance Tips for Your Home-Made Solar Panels
Keeping your DIY solar panels in tip-top shape is key to ensuring they continue to provide clean, efficient energy for years to come. Luckily, solar panel maintenance is relatively simple, especially with a few handy tips up your sleeve. Let’s dive into some basic maintenance tasks to keep your home solar DIY system running smoothly:
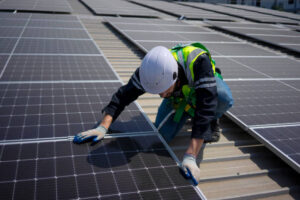
Regular Cleaning
Dust and Debris: Your panels need a clear path to catch the sun’s rays, so regular cleaning is a must. Use a soft brush or cloth to gently remove any dust, dirt, or leaves.
Water Spots: If you’re in an area with hard water, you might notice spots after rain. A simple solution of soapy water and a non-abrasive sponge can help keep your panels spotless.
Inspect for Damage
Wear and Tear: Over time, your panels might show signs of wear. Look for cracks, discoloration, or loose connections and address these issues promptly to avoid efficiency losses.
Cable Check: Ensure all wiring is intact and secure. Damaged or frayed wires can be a safety hazard and reduce the performance of your DIY solar power system.
Monitoring Performance
Track Your Output: Keep an eye on your system’s energy production. A sudden drop in output could indicate an issue with your panels or inverter.
Energy Bills: Watching your energy bills can also help gauge your system’s effectiveness. Consistent or increasing bills might signal it’s time for a maintenance check.
Professional Inspections
While DIY solar panel maintenance is straightforward, it’s a good idea to have a professional solar energy contractor inspect your system occasionally. They can spot potential issues you might miss and ensure your system complies with local regulations.
Seasonal Adjustments
Angle Adjustments: If your setup allows, adjusting the angle of your panels seasonally can optimize their efficiency throughout the year.
Snow and Ice: In colder climates, gently remove snow and ice to keep your panels exposed to sunlight.
Conclusion
In wrapping up our journey through the world of DIY solar panels, it’s clear that the path to sustainable energy is not only rewarding but also entirely achievable for the determined homeowner. Whether you’re setting up a few panels to power your home or taking on a larger commercial solar installation, the benefits of harnessing solar energy are undeniable. And for those in Phoenix looking to complement their green energy efforts with electric vehicle technology, remember that Tesla Charger installation in Phoenix is another step towards a fully sustainable lifestyle.
Frequently Asked Questions
Can I install solar panels myself?
Yes, you can! DIY solar panel installation is possible with the right guidance and tools. However, it’s crucial to follow safety precautions and local regulations.
How many solar panels do I need?
The number of solar panels you need depends on your energy consumption and the efficiency of the panels. Typically, a household requires around 20 to 30 panels for adequate energy production.
Do I need special equipment for installation?
Yes, you’ll need basic tools like a drill, ladder, wrench, and safety equipment. Additionally, a solar panel mounting kit and electrical wiring tools are necessary for a successful installation.
How long does it take to install solar panels?
The installation time can vary based on factors like system size and complexity. A DIY installation may take anywhere from a few days to a couple of weeks, depending on your skill level and available time.
What maintenance do solar panels require?
Solar panels are relatively low-maintenance. Periodic cleaning to remove dust and debris and regular inspection for any damage or shading are recommended. Additionally, checking the inverter for proper functioning is essential.
Contents
- 1. Introduction: Your Journey to Solar Independence
- 2. What You Need to Know Before You Start Your DIY Solar Project
- 3. How to Pick the Perfect Spot for Your Solar Panels
- 4. Simple Steps to Assemble Your DIY Solar Panels
- 5. Simple Steps to Assemble Your DIY Solar Panels
- 6. Wiring Basics for Your DIY Solar Panels
- 7. Testing Your DIY Solar Panels for the First Time
- 8. Get the Right Tools
- 9. Check the Weather
- 10. Measure Voltage
- 11. Measure Current
- 12. Inspect Connections
- 13. Verify Inverter Operation
- 14. Maintenance Tips for Your Home-Made Solar Panels
- 15. Conclusion
- 16. Frequently Asked Questions